INTRODUCTION
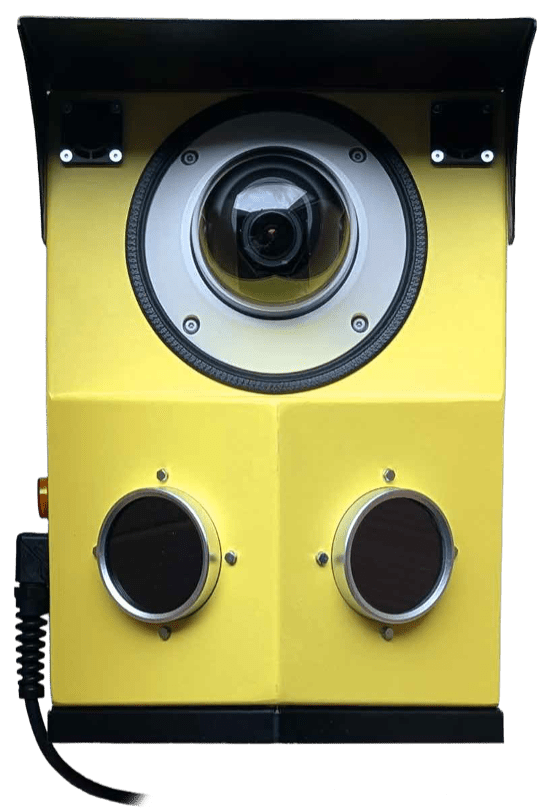
Thank you for choosing VIDEO GUARD . VIDEO GUARD offers mobile video-based alarm systems for protection against unauthorized intrusion, vandalism and theft.
In the following, you will learn how to set up and use the VIDEO GUARD COMPACT explained. However, if you have any questions about the function or rental If you have any questions, please do not hesitate to contact us on the following telephone number:
+49 (0) 4950 / 8062-0
(8 a.m. – 5 p.m.)
1. ATTACHMENT TO THE CONTAINER
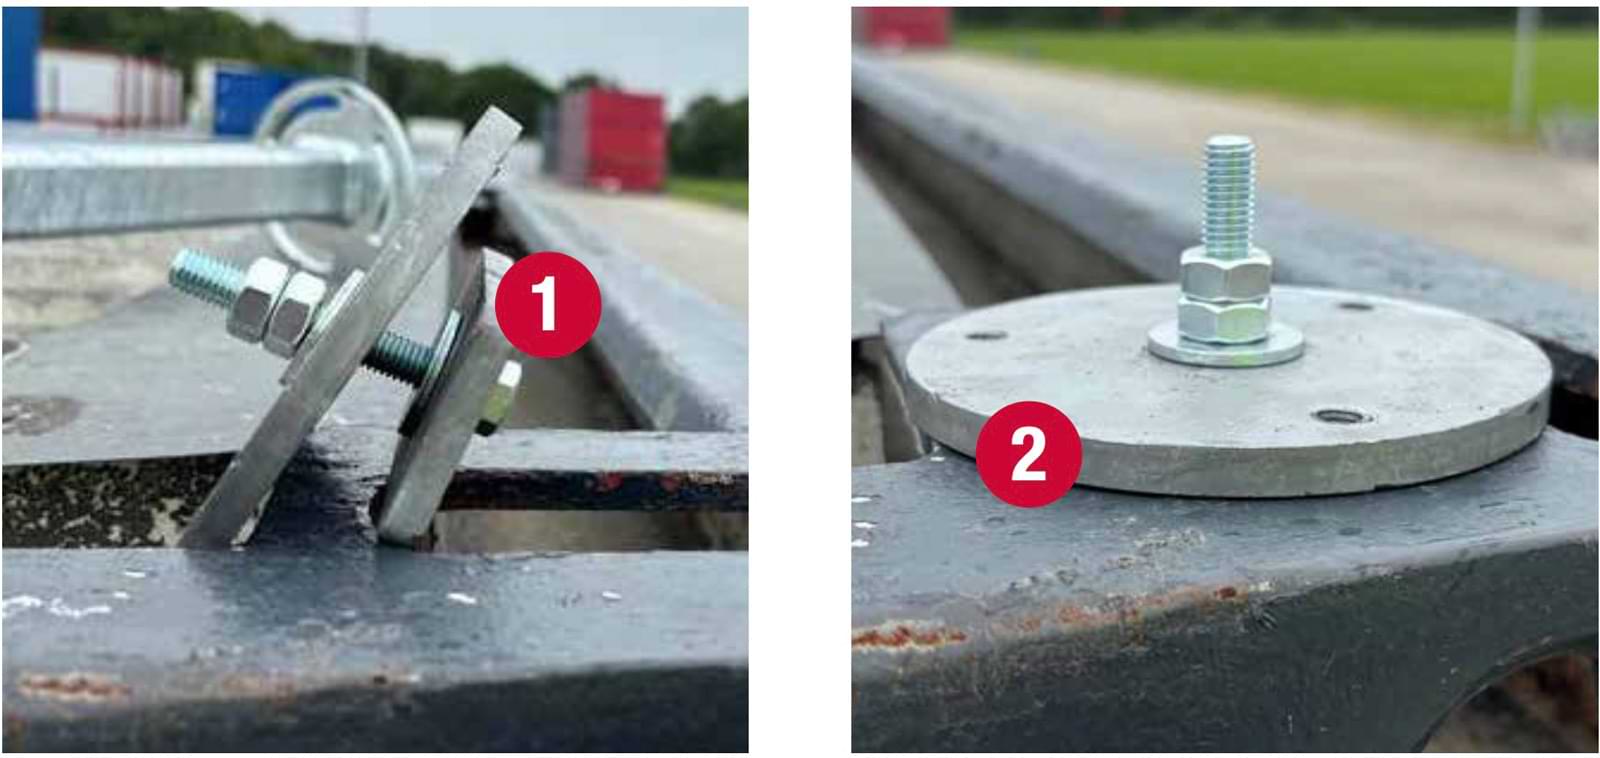
Attach the base of the container support leg to the container. Use the standardized holders on the container for this.
The square counter plate ① into the corner of the container and connect it to the round plate ② counter plate.
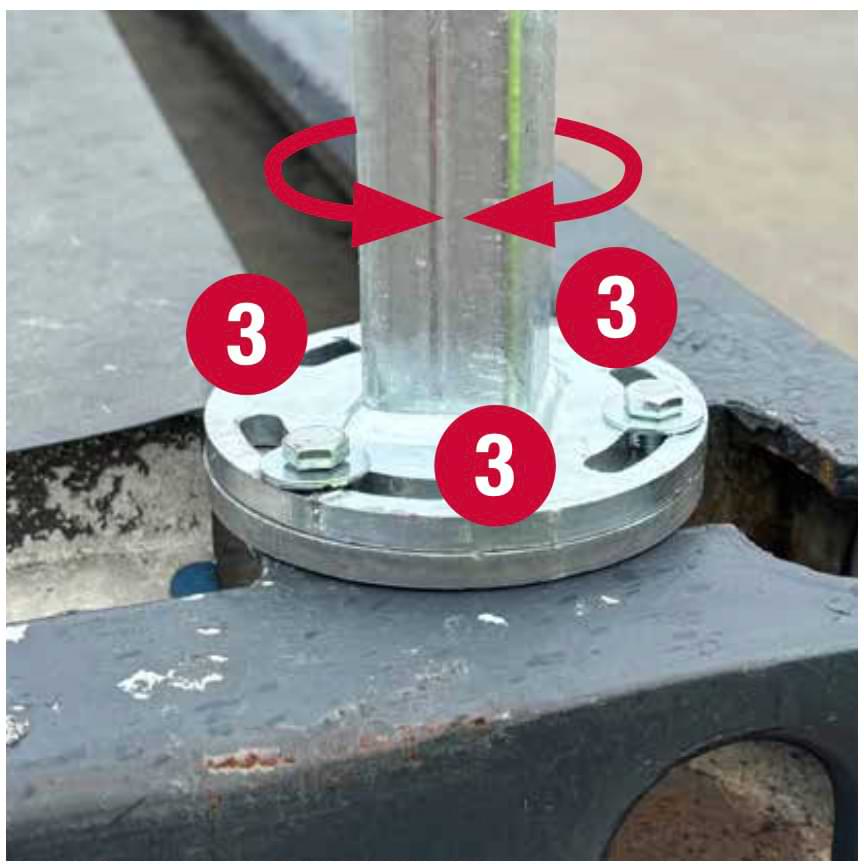
2. attach the container support foot
Screw the container support foot firmly to the base. The container support foot can be rotated thanks to the slotted holes ③ on the foot.
3. ATTACH BRACKET
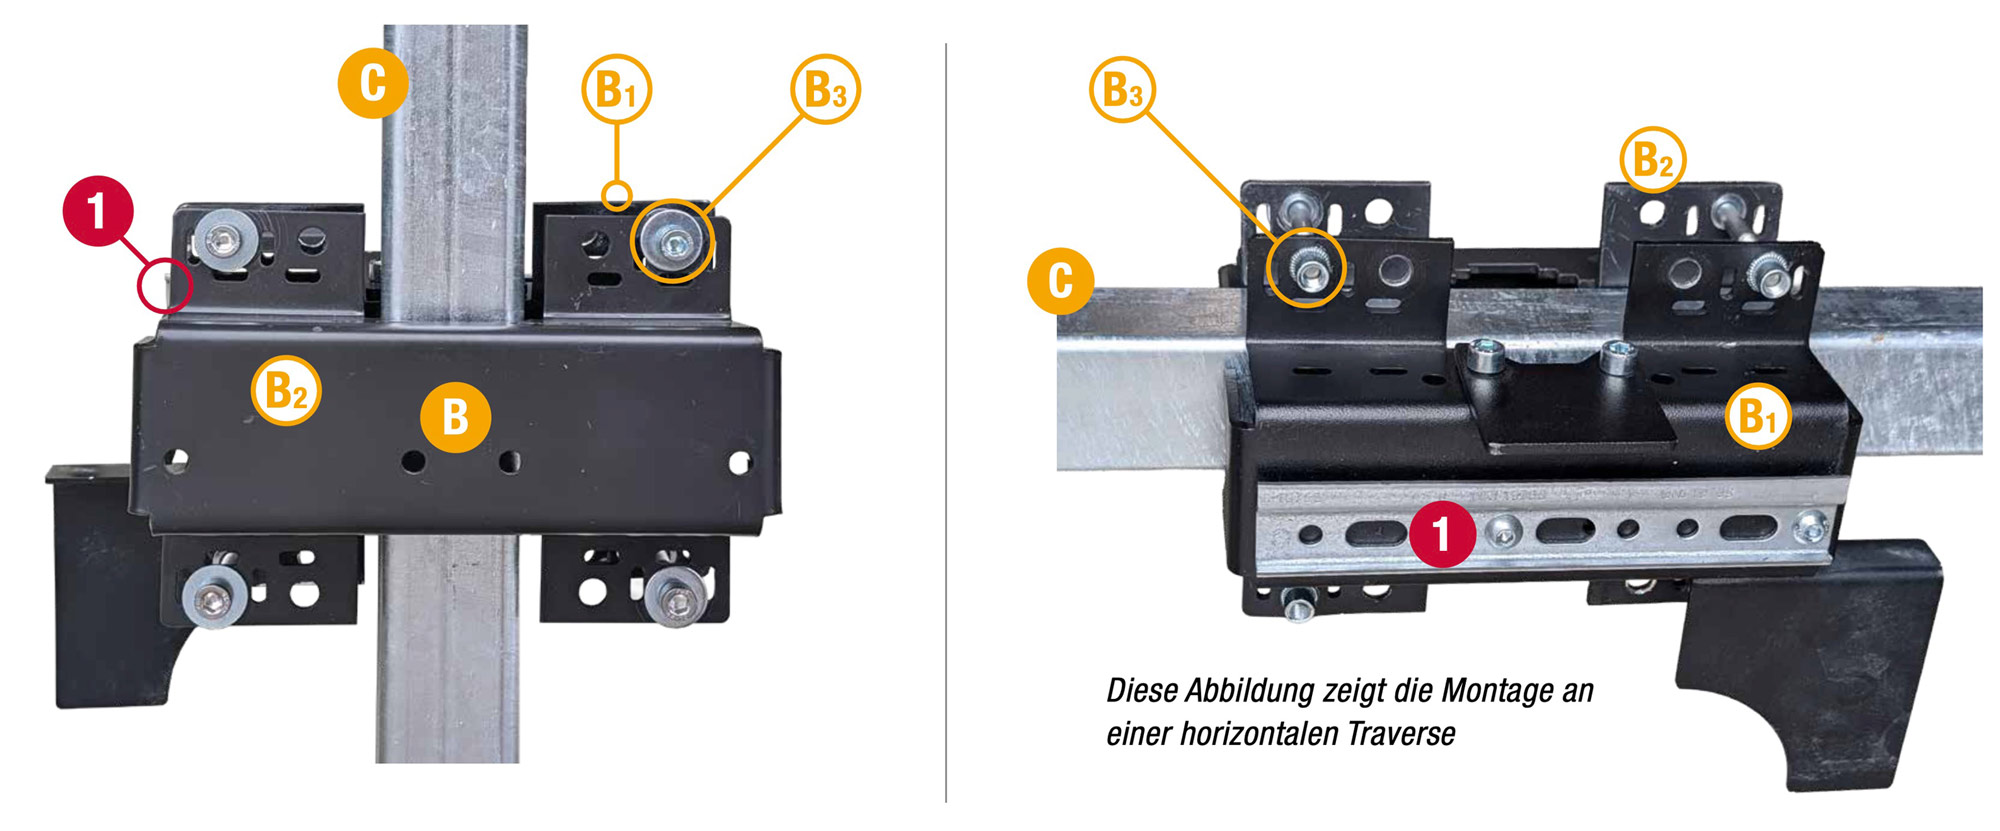
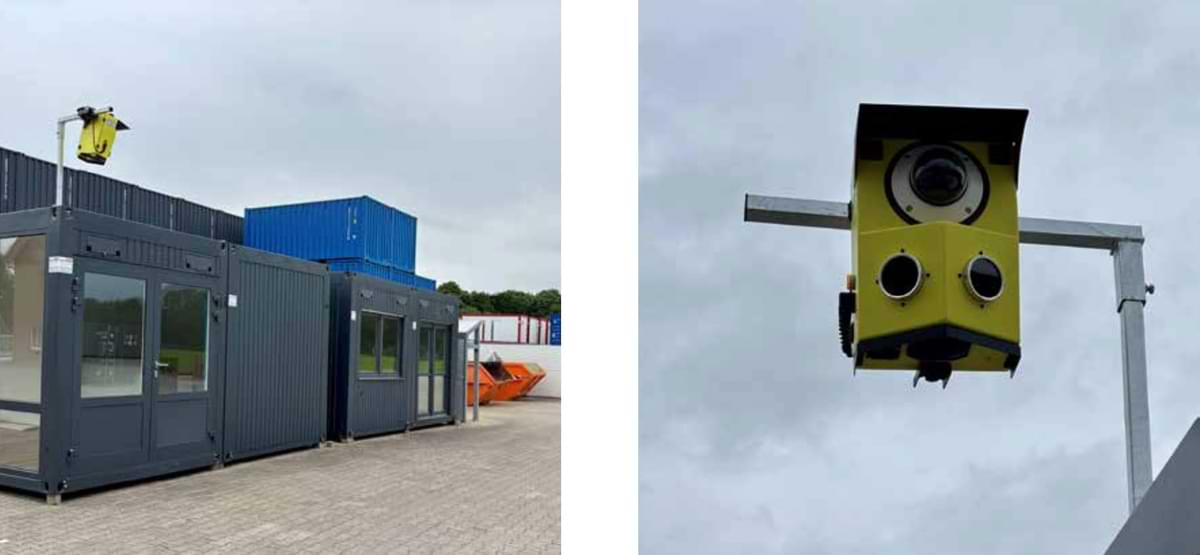
The VIDEO GUARD COMPACT bracket 🅑 (consisting of rail bracket 🅑 1 and counter bracket 🅑 2) is attached to a vertical mast (e.g. the 🅒 container mast, or a horizontal crossbeam such as on scaffolding) using 4 of the same screws 🅑 3 supplied ( do not forget the washers).
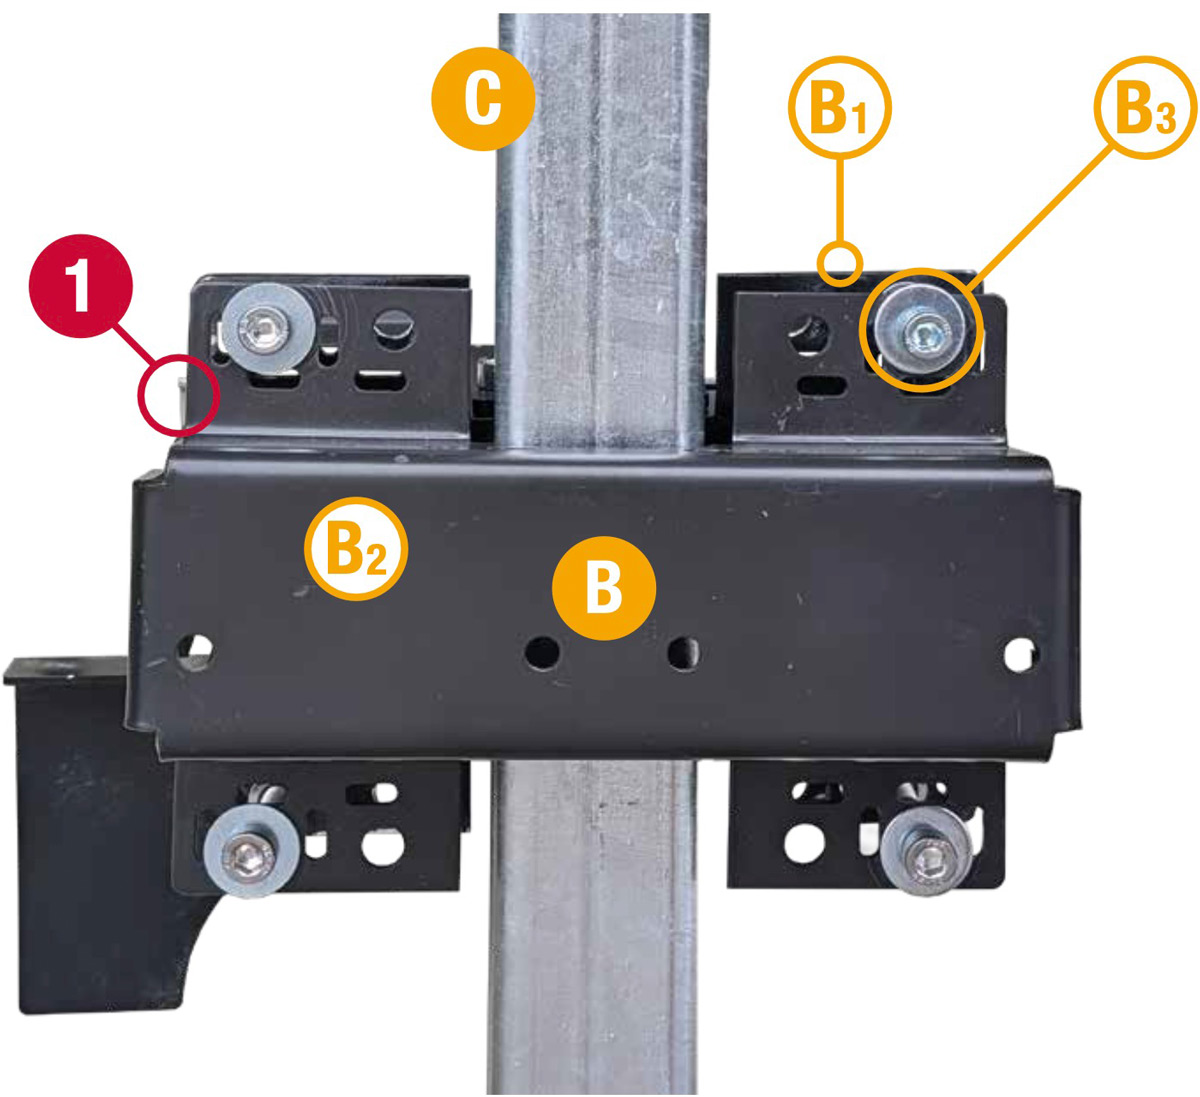
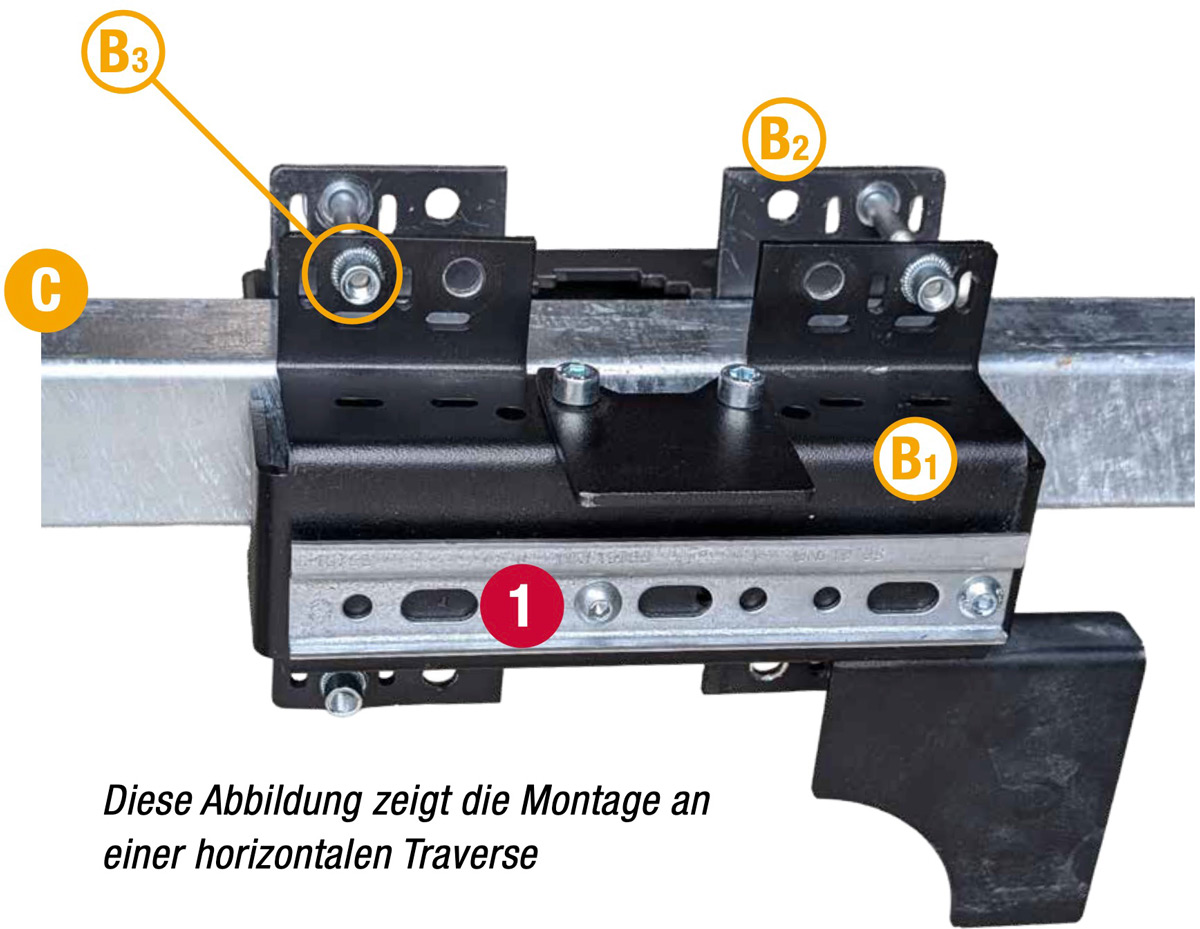
After installation, the rail ① must be aligned with the monitoring area with a tolerance of ±45°.
4. CONNECT AND SWITCH ON
Connect the VIDEO GUARD COMPACT to a 230 V AC connection and press the green button on the back for 3 seconds. The voltage display on the side of the VIDEO GUARD COMPACT should now show 230 V.
5. FIX VIDEO GUARD
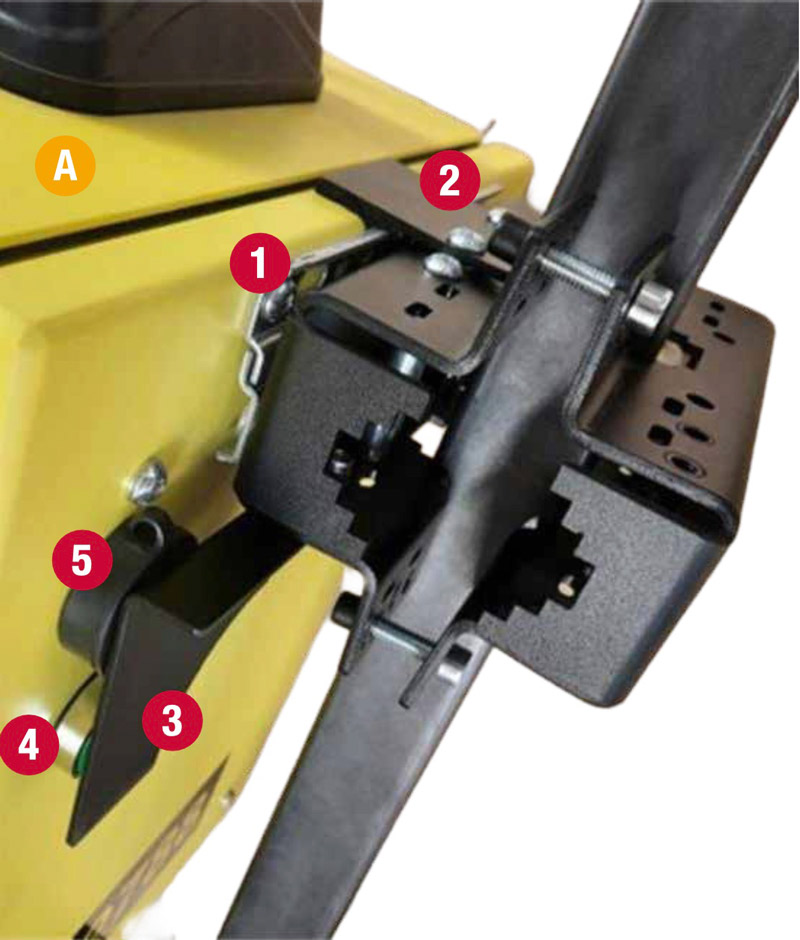
Hang the VIDEO GUARD COMPACT 🅐 on the rail ① and then screw the fixing plate ② tight so that the VIDEO GUARD COMPACT is fixed to the rail. The cover plate ③ on the bracket must cover the green button ④ and the lock ⑤.
6. ALIGN VIDEO GUARD
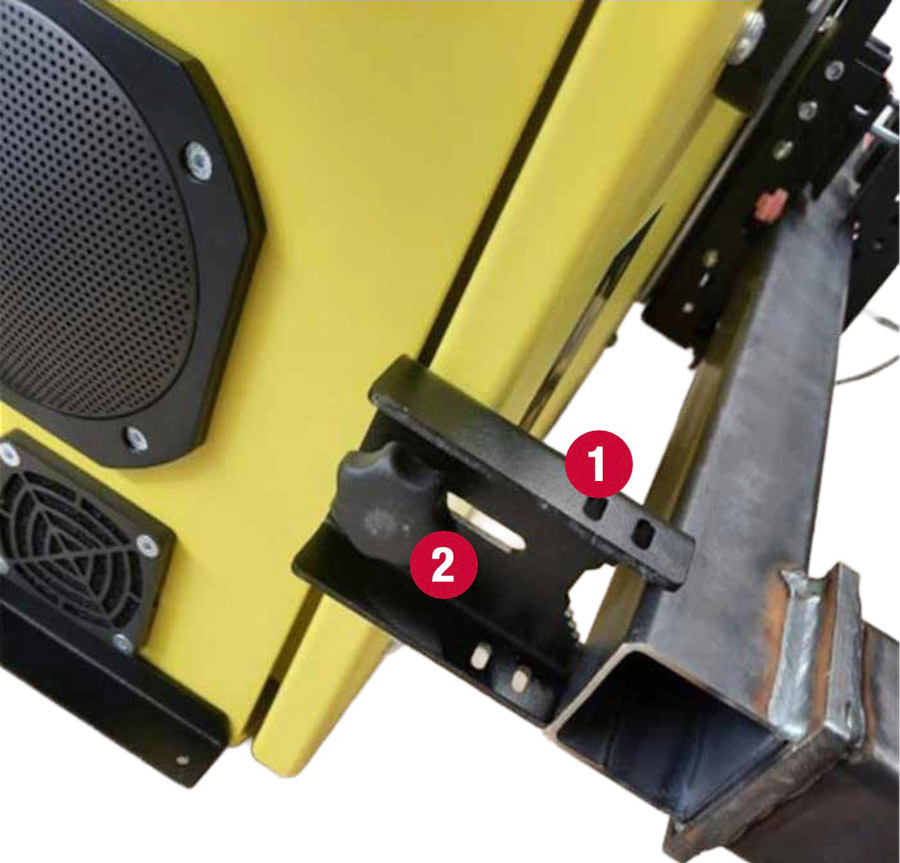
Use the adjustable spacer ① and the locking screw ② on the underside of the VIDEO GUARD COMPACT to tilt or tilt it as required.
7. HAVE VIDEO GUARD ACTIVATED
Contact your VIDEOGUARD24 sales representative to complete the VIDEO GUARD COMPACT setup.
INSTALLATION INSTRUCTIONS
OPTIONAL
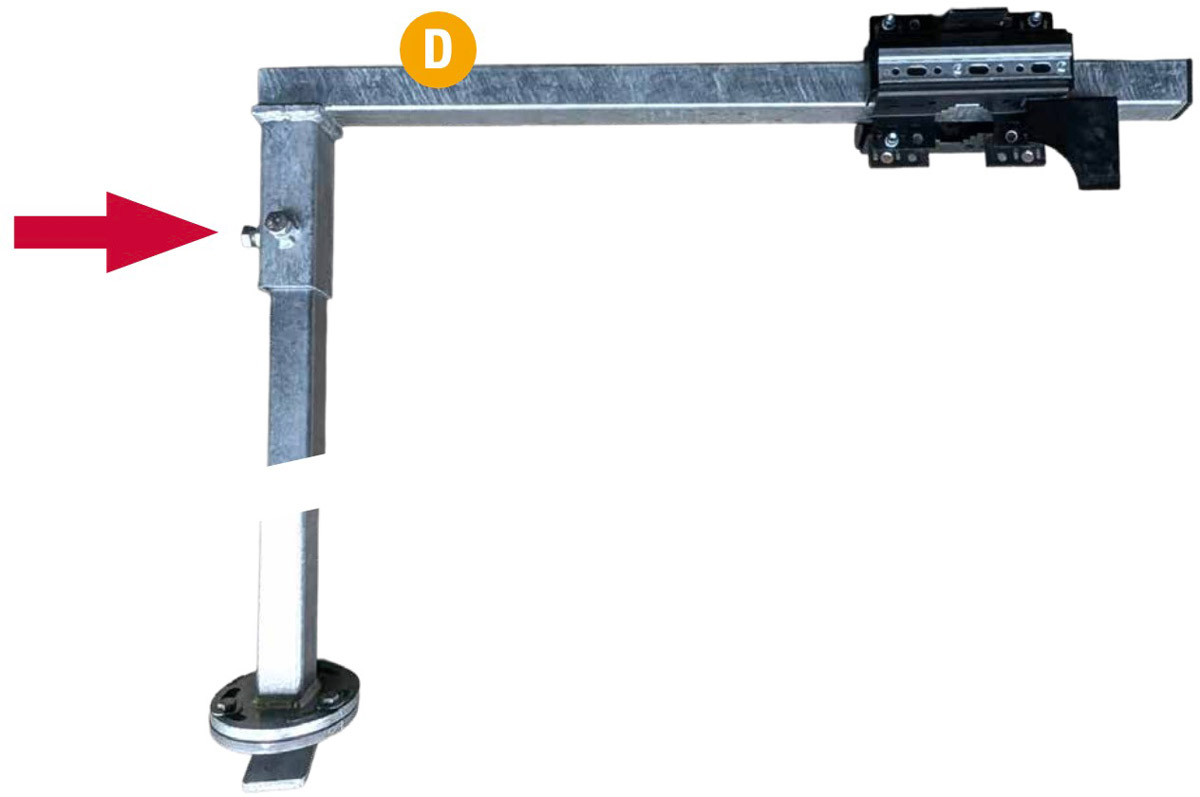
If you want to look over the side of the container when using the container mast, you need the 🅓 cantilever arm. Once assembled, the cantilever arm is placed on the container mast and fixed in place with two M12 x 20 mm screws.
If you have any further questions about the function or rental of a VIDEO GUARD , please do not hesitate to contact us on the following telephone number:
+49 (0) 4950 / 8062-0
(8 a.m. – 5 p.m.)
RETURN DELIVERY BILL
Please enclose this completed return delivery bill when returning the VIDEO GUARD:

